
What is the best way to fix a hole in air mattress? Using Nail Polish? Let’s find out.
What could be more irritating than the sound of a deflating air mattress when your guests just called in to report they are spending the night at your place?
It’s made worse if you don’t have your patch kit read.
There’s no need to be irritated just yet if you have nail polish though. Be inventive in your approach to repairing a hole in an air mattress with nail polish.
The good news is that you can simply address these air mattress holes, and you may not even require the patch kit that came with your airbed. In reality, an air mattress may be repaired with duct tape, superglue, or even nail polish!
In this article, we show you how to fix a hole in an air mattress with nail paint, step by step.
How to Fix a Hole in an Air Mattress with Nail Polish
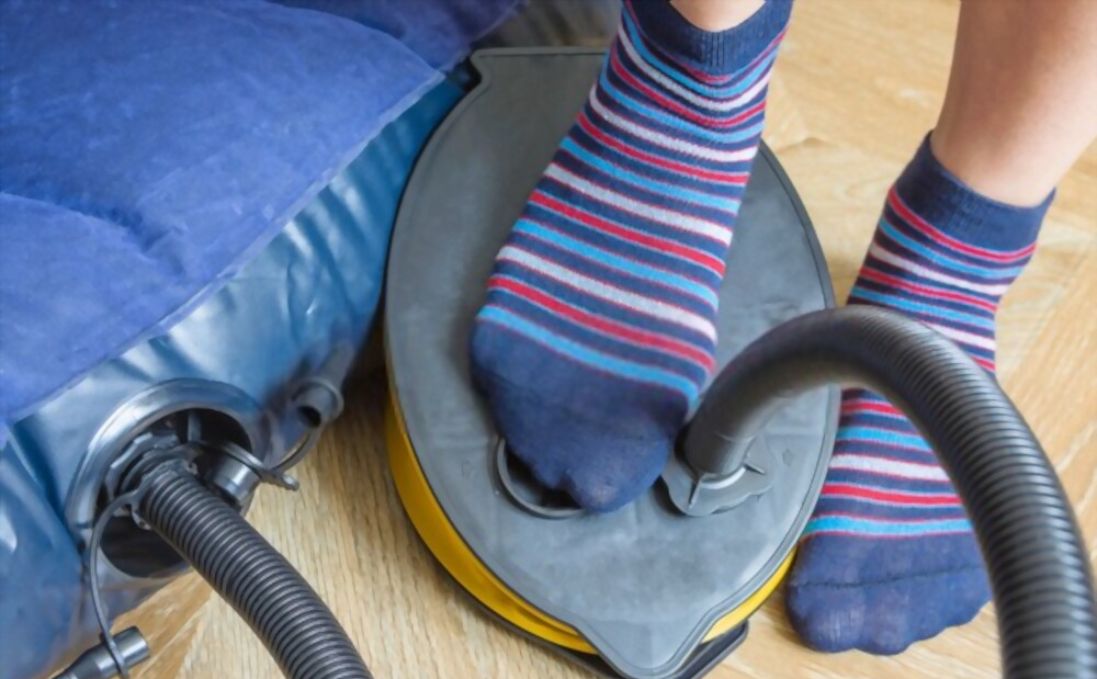
Step 1: Locate the hole in the air mattress
The first step in resolving the problem is to identify it. The main question is how to find the hole in an air mattress. There are numerous methods for locating a hole, and we will look at a number of them. But first, carefully inflate the mattress.
Inflate your air mattress to its full capacity and close the valve as usual. Then attempt to hear the soft sound of air escaping from your airbed.
Alternatively, you might make a good amount of dish soap and water mixture.
Generously spray the mixture on the mattress. The leaking air will create foam or bubbles, making it easy to find the hole.
Once you’ve found it, mark it with a tailor’s pencil or a marker and let the airbed dry before moving on.
Step 2: Mark the location of the hole
After marking the hole, deflate the air mattress.
Check out this article for more on How to Find a Hole in Air Mattress the easy way.
Assume you’ve discovered the leak. To repair the hole, you must first deflate the mattress. However, unless you mark it beforehand, you will lose the location when it deflates.
So, as soon as you find the leak, mark it, using a permanent marker or something that will not get erased fast.
If you use soap water to pinpoint the leak, allow the mattress to dry for 1-2 hours before immediately drying the identified area with a towel. You are now ready to repair a hole in an air mattress.
Step 3: Clean the marked area around the hole
Using a diluted all-purpose cleaner together with a lint-free cloth, clean a small area surrounding the leak that extends an inch or two beyond where you intend to apply the patch, then make sure you dry the area completely, possibly using another dry, lint-free rag.
If your air mattress has a suede-like flocking finish, eliminate that texture by applying some moisture on it with a rag, lightly sanding with fine-grit sandpaper, and then washing the sanded area.
This creates a smooth, even surface for the adhesive to adhere to.
Step 4: Use nail polish to fix the hole in the air mattress
This is where things get a little more imaginative, but sure, you can completely repair a hole in an air mattress with nail paint.
Just keep in mind that it is only a temporary solution to the damage because once dry, the nail polish will lose its viscosity and may not be able to survive continual inflations and deflations over a long period.
So, when you’ve completed all of the preparations and degreased the mattress surface, here’s what you should do:
- Cover the puncture with a thin layer of nail paint. It will act as a primer, forming a coating above the puncture. Try not to move the airbed while it is drying, since this may cause a seal to break.
- Repeat as many times as necessary. Apply 5-6 layers of nail polish to achieve the best results. It will form a thick coating, which will keep the air inside.
You can apply a clear nail polish or one with a similar hue to make the repair less noticeable.
Warming: Do not move the mattress until your nail polish applied on the patch has completely dried and sealed.
Step 5: Test if the puncture is fixed
Put some weight on top of the air mattress and let it stay there for a couple of hours. You can begin by adding about 5 pound, letting it stand for an hour then adding more weight every hour for about 6 hours.
How to Patch an Air Mattress with Super Glue and Duct Tape
If you bought your air mattress with a patch kit, use it to seal the hole and follow the instructions they provided.
Patch kits are also available from mass merchandisers and online.
If you have a bicycle tire repair kit, it will serve you well enough too. If you find yourself I n a pinch, thin plastic materials, for example, a tarp or a shower curtain liner, can help.
On both sides, cut the patch about a half-inch larger than the hole. Apply adhesive liberally on the patch, paying special attention to the center.
FYI, adhesives that work include gorilla glue, Super glue, contact cement, and rubber cement, especially if you happen to own any of them.
However, if you’re replenishing, consider choosing Coghlan’s Airstop Sealant, which has been praised by many users for these types of fixes and costs less than $10.
Patch the hole in the air mattress using that sticky piece of plastic and make sure to press down firmly, pressing in a circular motion as that will eliminate any air bubbles and achieve a secure seal between the patch and the mattress.
(i) Fixing the patch using Superglue
Superglue could be useful for mending an airbed with a small and thin puncture that has two edges to be adhered together, such as a tiny scissors cut or a minor knife puncture.
There are two ways you can use superglue to repair the hole in your airbed:
Use the superglue an adhesive for a previous DIY-patch procedure, or simply squeeze it over the puncture without necessarily creating any patches.
Apply the adhesive to the damaged part using stitch-like motions.
Once the initial coat is dry, apply another layer until the entire puncture and at least 0.5” of area surrounding it are covered.
Then, proceed to inflate the mattress and inspect it for leaks.
When you don’t have a repair kit with you while camping, superglue is usually a fantastic option for patching a mattress.
Find out if the patch is adhered strongly
Place some weight of about 10-20 pounds (for instance, a dumbbell or a stack of books) over the glued patch and leave it for a minimum of eight hours.
You’ll want to make certain that the patch adheres, so don’t take too much precaution about the weight.
Check the bottle of your glue to ensure that you follow the cure time requirements.
Test your air mattress the last time
Get the weight off the mattress, re-inflate it, and dust a little amount of talc or something like baby powder over the patched air mattress once the glue has completely cured.
Gently press down on the mattress; if the powder flies, reapply the patch. If it stays in place, you may truly rest easy knowing you’ve succeeded!
(ii) Using marine glue to fix hole in air mattress
Marine Goop (also called the Amazing Goop) is one of the most powerful adhesives available today.
Marine Goop is not only waterproof, but it is also UV-resistant, and can be used as a sealer, making it an excellent choice for fixing a leaky airbed you intend to use outside.
In that case, fixing the puncture consists of the following steps:
- Sand and degrease the surface. Goop improves the seal on a little uneven surface. But don’t overdo it to the point of rubbing through the airbed.
- Apply a thin layer of Goop to the area above the leak. Make an even seal above the puncture, covering about half an inch surrounding it. Put on rubber gloves and an old toothbrush or paint brush to protect your hands.
- Let the sealant cure. The manufacturer suggests allowing the sealant to dry for at least 24 hours, however this may vary based on the climate or temperature in your home.
(iii) Use Duct Tape to Repair a Hole
Finally, if you need to patch a hole in an air mattress without a patch kit and don’t have any glue handy, use duct tape.
Apply a portion large enough to fill the puncture as well as some space around it to the degreased surface.
However, the glue on the duct tape tends to lose its grip over time, so if you want to employ this remedy, you may find yourself having to repatch the hole on a frequent basis.
However, it may serve as a temporary cure until you can obtain a patch kit or a strong glue to completely repair the hole.
So, have you experimented with any of these methods? You are welcome to share your experience in the comments section below.